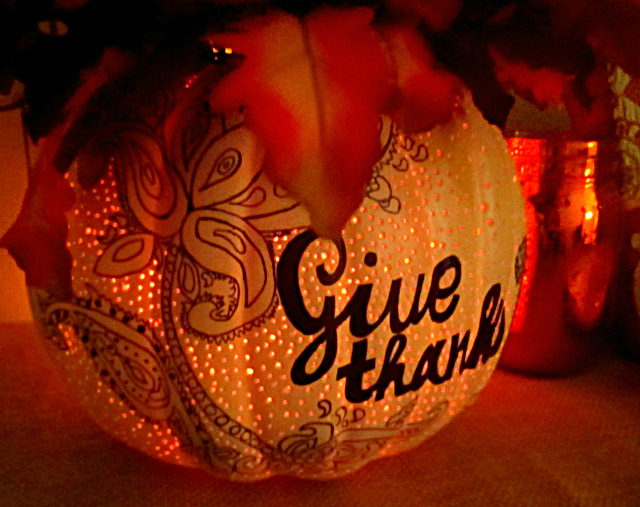
I had this faux white pumpkin on hand from a clearance sale last year, and I could'n't really figure out what to do with it.
I grabbed my pencil and started to doodle on it. I lettered out "give thanks" then framed it with a paisley style doodle on the top and bottom corners. Next, I grabbed my fine point black Sharpie and started to fill in the lettering and outline my doodle. When finished, I went back and gently erased any remaining pencil marks. After the Zentangle was completed, I grabbed some tooth picks and left over bamboo skewers, and poked a variety of different sized holes in the face of the pumpkin; around the perimeter of the design and lettering. I completed the lighted pumpkin base/vase with a 5 watt light from A.C. Moore ($2.99), and I made a pretty little Fall arrangement for the top.
The arrangement is suspended with floral foam that I cut to fit the carved hole in the top of my pumpkin. I secured the foam/arrangement with hot glue. It sits just inside the top of the pumpkin, which left the entire bottom inside portion of the pumpkin free for the lamp. NOTE: I replaced the 5 watt bulb that came with the lamp with a LED bulb, as the LED bulb produces little to no heat.
Check out the supply list to make your own lighted Sharpie Zentangle Fall Pumpkin Vase below, along with my step-by-step image tutorial.
What you'll need:
- pencil
- eraser
- low temp hot glue gun
- hot glue sticks (I used less than 1 low temp glue stick on this project)
- foam carvable craft pumpkin
- carving knife
- toothpicks
- bamboo skewers
- small 5 watt lamp (NOTE: I replaced the 5 watt bulb that came with the lamp with a LED bulb, as the LED bulb produces little to no heat.)
- dry floral foam block/ball (cut to snugly fit in the carved top of your pumpkin - you can also add a few dabs of hot glue to secure it into the space)
- seasonal silk flowers to create a small arrangement for your lighted pumpkin vase (using the dry floral foam block/ball)
How to make a lighted sharpie Zentangle Fall pumpkin vase:
I placed my pumpkin on my entryway table and put it on a timer. I love the soft glow that comes through all of the little holes in the pumpkin, in the evening when it turns on. Fall has arrived - it's my absolute favorite time of year!
Happy Fall everyone & happy crafting!


